step 1: buy in ebay or amazon. just search for "in cabin filter <make/model of your car>".
step 2: get a short philips screw driver
step 3: remove the cover under the glove compartment by pushing the 2 tabs then pulling it down
step 4: remove the side panel. it's just friction fitted so just pull it out with force
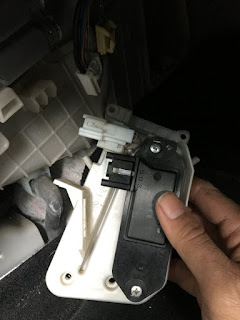
step 5: this step is challenging you need to be a contortionist and need to work blind (feel and touch). remove the 4 screws located on the white plastic portion of the cover. they go in the 4 holes as you can see in the photo below. it's easy to think those 2 screws on the black bar needs to be removed but that's wrong. you will need to use feel and touch to remove the top 2 screws.
step 6: remove the 2 filters and vacuum the insides of the filter housing. notice how dirty the old filter is. it has not been changed for 5 years.
step 8: your new filter may come with an illustration on which filter goes on top and which one goes at the bottom. the side with the tabs will be on the outer side because the tabs are used to pull it out.
if it does not come with the illustration, then just note that the one with the shorter tab goes above. in case both tabs have the same length, then connect both filters by inserting the edge with the widest slab into the edge with the deepest canal.
if the filter does not have side tabs then see if it has arrow markings to indicate the direction of the airflow. use this to figure out the orientation.
step 9: insert the top filter and lift up. hold it with your finger (right hand) and use the other hand to insert the bottom filter. you need to be a contortionist to do this step (i don't know why mazda did not make it just a 1 piece filter you can easily pull out and insert, especially you need to replace the in cabin filter at least once a year)
step 10: put back the covers
(for more of my knowledge bombs, click the "ian's knowledge bombs" banner at the top of this article and choose any article in the table of contents that piques your interest)


No comments:
Post a Comment